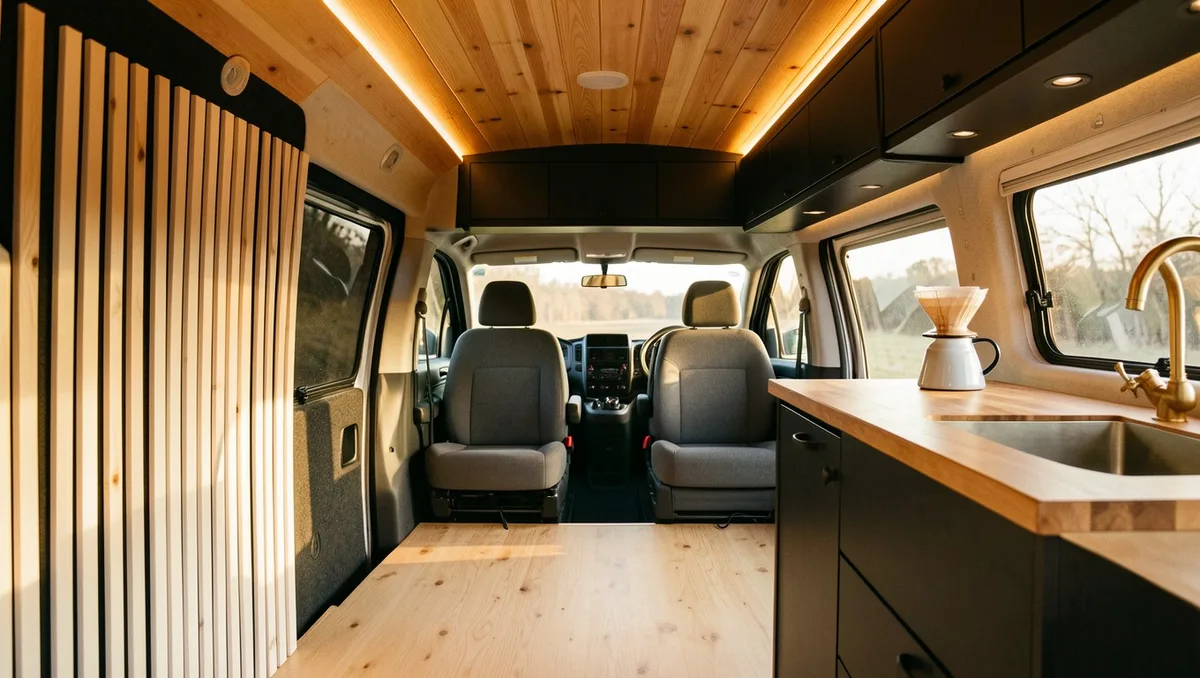
You staring at the raw metal walls of a high-roof van, trying to figure out how to make it feel like home without turning it into a dark, claustrophobic 1970s sauna.
It is a frustratingly easy trap to fall into. Heavy solid pine planks and dark stains will instantly swallow your natural light, make 6-foot ceilings feel squished, and gobble up hundreds of pounds of precious payload.
The secret isn’t avoiding real timber altogether—it is balancing grain direction, wood species weight, and light reflectivity.
Here is how to build a cabin-quality interior that expands your vertical space while keeping your vehicle build completely safe and agile.
The Anatomy of Campervan Paneling: Weight, Moisture, and Grain Mechanics
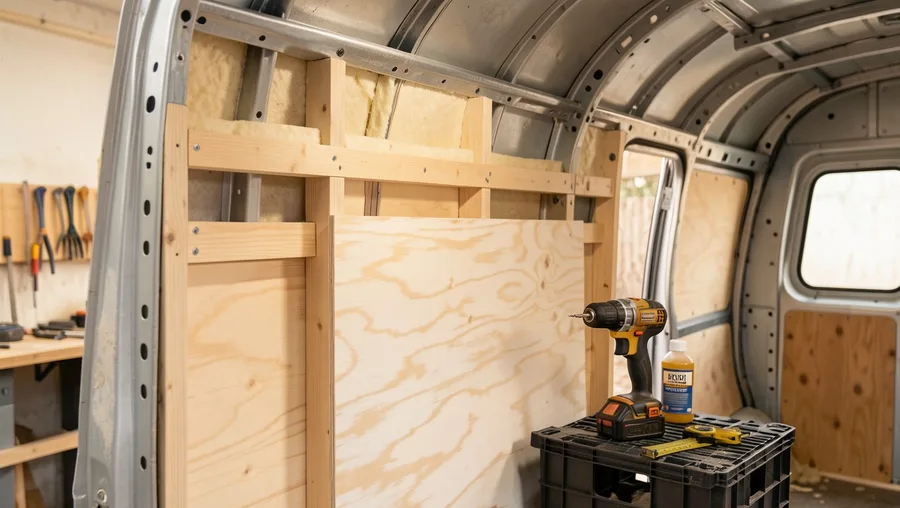
A moving vehicle is a brutal environment for raw carpentry work.
Your van shell expands and contracts with outside temperature swings, while interior moisture from cooking and breathing gets trapped against freezing metal ribs. If you nail solid wood directly to metal frames, the wood will cup, squeak, and buckle within a single season.
Every wood species brings a distinct strength-to-weight ratio and moisture profile to your build payload.
Dense hardwoods like solid oak or maple add severe weight overhead, raising your vehicle’s center of gravity and eating into your Gross Vehicle Weight Rating (GVWR). Lighter softwoods like Western Red Cedar or engineered Baltic Birch plywood deliver structural stability at half the mass.
Pair your wood selection with a mandatory 1/8-inch expansion gap at all wall junctions, and seal every side with low-VOC marine hardwax oil.
Popular Campervan Paneling Materials — Weight & Cost Comparison
Weight estimates include furring strips and fasteners. Prices reflect average US lumber yard figures.
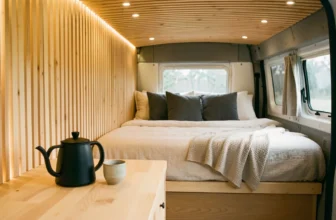
1. Vertical Honey Cedar Planks for Height-Boosting Warmth
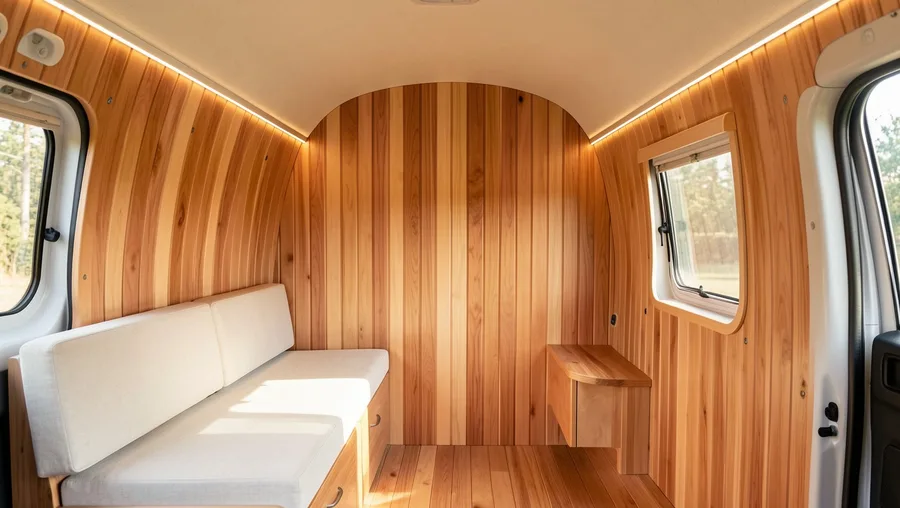
Low ceilings are an inevitable reality in campervan conversions.
Installing narrow 1/4-inch Western Red Cedar planks vertically draws the eye upward, creating an immediate illusion of added vertical height. The rich honey tones bring natural warmth into the living area without making the narrow space feel tight.
Cedar is naturally rot-resistant, making it ideal for managing humidity from van cooking and wet gear.
This look works best in compact medium-roof van layouts where every inch of perceived ceiling clearance matters.
Keep cabinet faces crisp matte white to prevent the honey timber tones from overpowering the living zone.
💡 Tip: Use blind-nailing through the tongue grooves with stainless steel brad nails so no fastener heads interrupt the continuous vertical lines.
Best For — Vertical Honey Cedar
2. Slatted Acoustic Oak over Dark Felt for Studio Sound Control
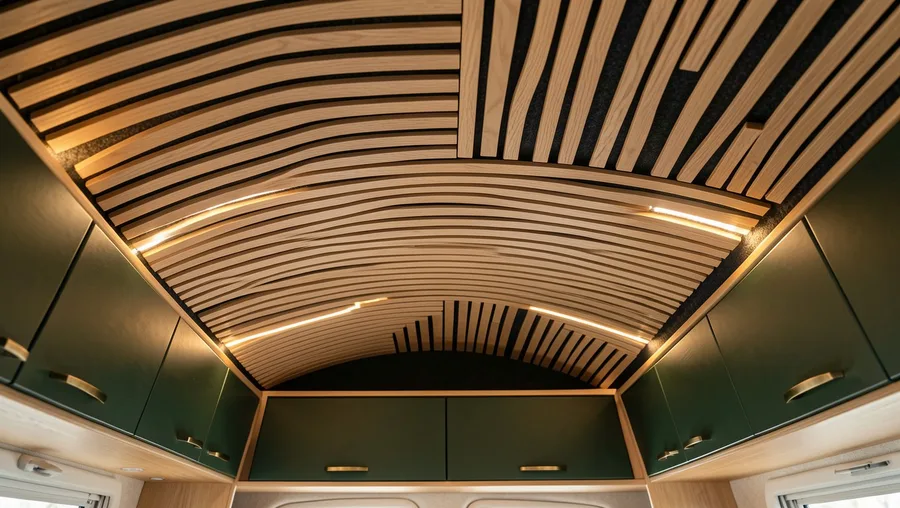
Hollow metal van hulls resonate like acoustic drums while driving down the highway.
Slatted acoustic paneling places thin 1/2-inch oak strips over a dense 1/8-inch PET felt backing. The dark felt gaps absorb road chatter and damp interior echo, turning a noisy metal shell into a quiet, studio-grade cabin.
Sound dampening is instant and noticeable.
This style suits long-wheelbase campervans where large metal panels produce excessive interior road noise during long travel days.
Choose real oak veneer over lightweight Baltic Birch cores rather than solid oak slats to avoid heavy overhead weight.
💡 Tip: Mount the felt-backed panels with dark black screws hidden inside the slat gaps for a clean, invisible installation.
Acoustic Oak Slats — At a Glance
🔈 Noise Reduction
Up to 40% Sound Absorption
⚖️ Weight Impact
0.85 lbs / sq ft
🛠️ Install Difficulty
Moderate (Panelized Sheets)
🌲 Core Material
Veneered Birch Ply
Pro Insight
Combines thermal insulation, vibration dampening, and architectural depth in one single wall layer.
3. Whitewashed Baltic Birch for a Bright Scandinavian Studio
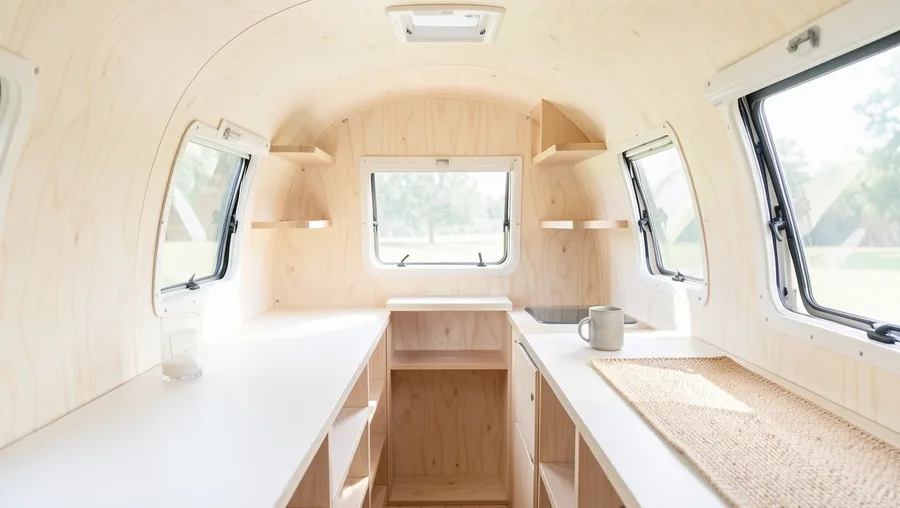
Dark wood interiors can feel claustrophobic on rainy travel days.
Thirteen-ply Baltic Birch plywood offers exceptional structural strength without dark knots or internal voids. Coating 1/4-inch sheets in a translucent white-wash hardwax oil preserves the organic grain texture while reflecting up to 80% of ambient cabin light.
Your interior stays bright even under cloudy skies.
Perfect for remote workers and digital nomads spending full working days inside a compact van office layout.
Use kerf-cutting on the backside of the sheets to bend the rigid plywood cleanly around curved upper ceiling transitions.
Campervan Wood Paneling — Myths vs. Reality
4. Reclaimed Barnwood Accent Walls for Focal Rustic Character
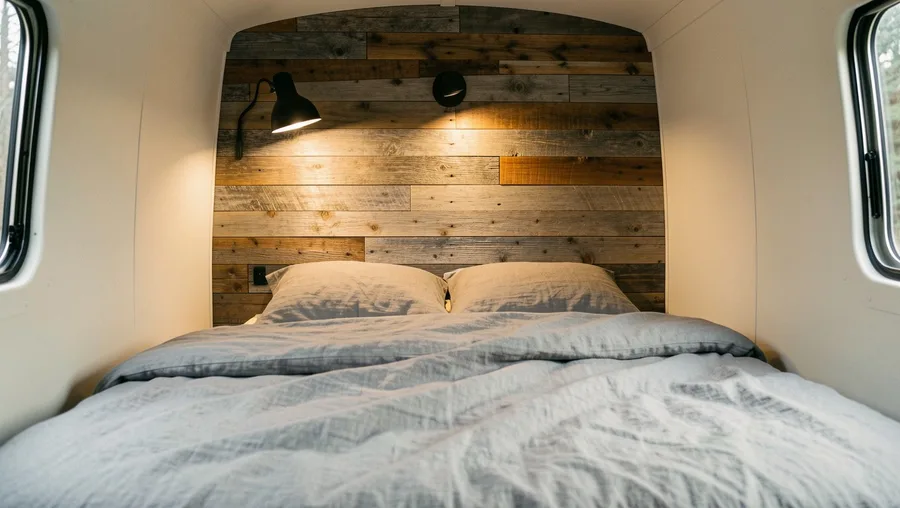
Covering an entire campervan in dark, distressed timber will turn it into a cave.
Limiting heavy-texture reclaimed barnwood strictly to one accent wall—like the headboard behind your platform bed—adds rich character while keeping the rest of the build open and bright.
One focal wall is all it takes.
Best suited for off-grid adventure builds where rugged, worry-free surfaces hold up against scratches from mountain bikes and gear.
Source thin 1/8-inch reclaimed real-wood veneers glued to lightweight backing panels rather than using full-thickness antique barn boards.
💡 Tip: Seal reclaimed wood with a matte water-based polyurethane to lock down splinters without adding a synthetic plastic sheen.
⚠️ COMMON MISTAKE
Never Use Full-Thickness Solid Timber for Accent Walls
Using 3/4-inch solid barn boards on a single van wall can easily add 80+ pounds of unnecessary dead weight. Always opt for 1/8-inch engineered wood veneers or precision-milled thin skin planks.
5. Horizontal Wide-Plank Shiplap in Soft Cream for Coastal Breadth
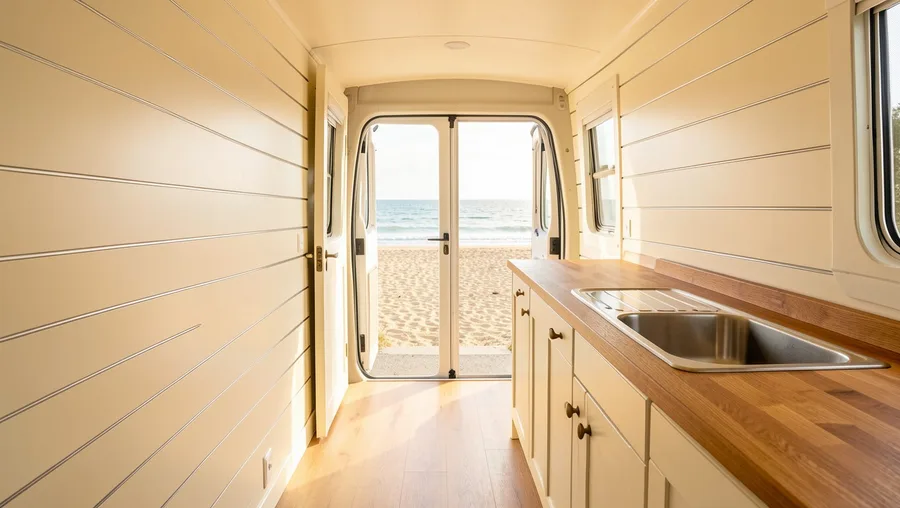
Narrow van hallways often feel tightly pinched along the center aisle.
Running wide 5-inch horizontal shiplap planks along the sidewalls visually pushes the interior boundaries outward, expanding the narrowest axis of your living space.
Horizontal lines make tight aisles feel wider.
Ideal for long-wheelbase campervans featuring a central walk-through floor plan from the front cab to the rear lounge.
Opt for nickel-gap shiplap profiles, which leave a clean 1/8-inch shadow joint that allows wood to shift slightly during driving without cracking painted seams.
6. Rich American Walnut with Embedded LED Channels for Executive Luxury
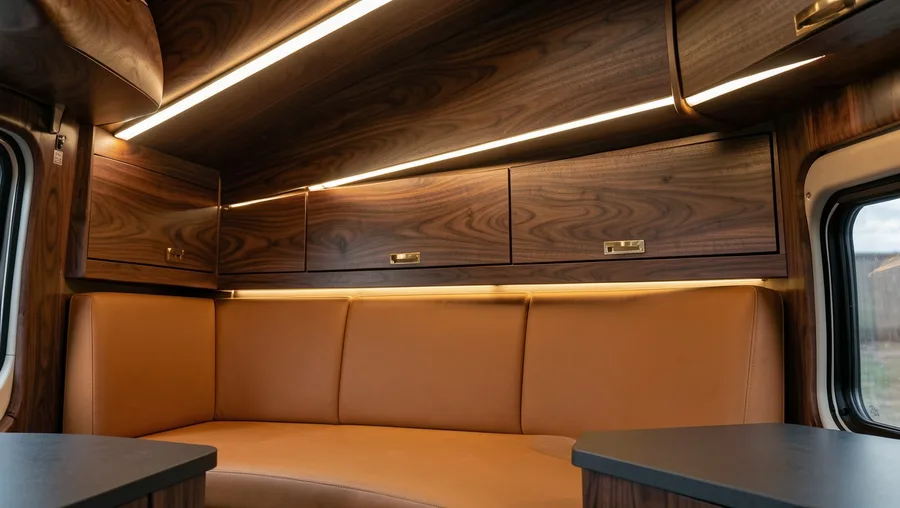
Dark hardwood is often avoided in small spaces out of fear it will feel too small.
American Walnut brings unmatched luxury, rich chocolate grain, and sophisticated elegance when offset by modern, warm linear lighting. Flush-mounted LED diffusion channels recessed directly between walnut panels bounce indirect light across the deep grain.
Strategic lighting completely neutralizes spatial compression.
Works best in high-end custom campervan builds featuring leather seating, dark slate tiles, and bronze fixtures.
Use 1/4-inch walnut-faced marine plywood to ensure dimensional stability against high cabin humidity.
The Campervan Paneling Priority Pyramid
Build your interior paneling system from foundation to decorative finish.
7. Geometric Chevron Door Inlays for Artisan Outdoor Backdrops
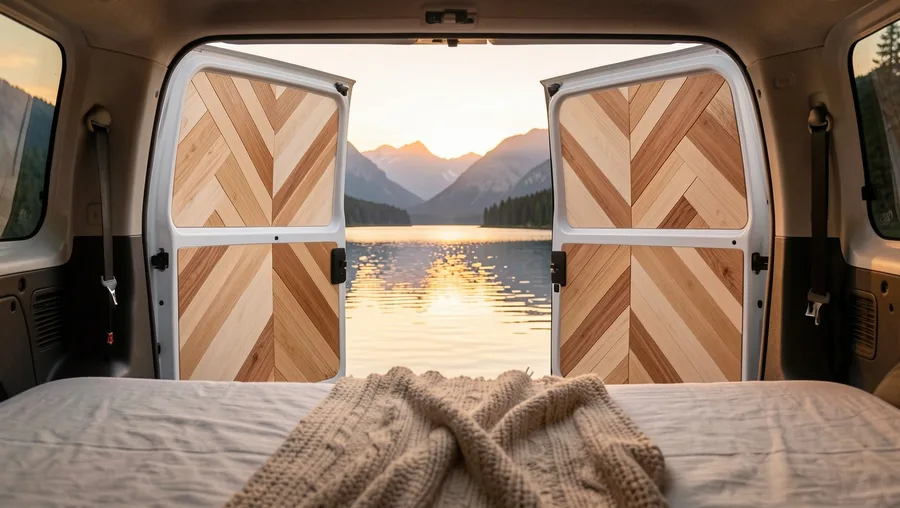
Rear van doors are often treated as utilitarian afterthoughts.
Cladding the interior door panels in a lightweight chevron or herringbone pattern transforms open van doors into an eye-catching artisan frame for outdoor views.
Open doors instantly become a custom design backdrop.
Ideal for travelers who spend hours sitting on the rear bed platform taking in mountain or beach landscapes.
Assemble the chevron pattern using ultra-thin 1/8-inch timber strips glued to a 1/8-inch Baltic Birch backing sheet to prevent door hinge strain.
💡 Tip: Incorporate heavy-duty door stay straps to hold patterned rear doors locked open at 90 degrees against wind gusts.
8. Marine-Grade Teak Slats for Water-Resistant Spa Wet-Baths
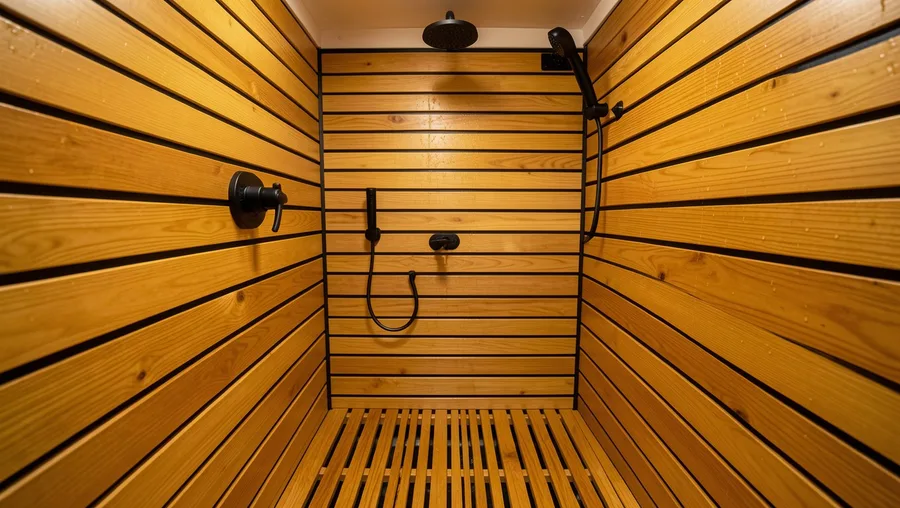
Bringing natural wood into a campervan shower stall requires serious waterproofing.
Teak contains natural high oil density, making it inherently resistant to water, steam, and mold growth. Slatted teak wall paneling and removable floor grates transform a sterile plastic wet-bath into a warm, luxury spa shower.
Teak handles direct water spray effortlessly.
Essential for full-time vanlifers who demand an indoor shower without sacrificing natural warm aesthetics.
Maintain slatted teak every six months with a quick wipe of marine-grade teak oil to preserve its rich golden-brown hue.
Marine Teak Wet-Bath — Spec Sheet
💧 Water Rating
100% Direct Spray Proof
🛢️ Natural Oils
High Density (Rot Proof)
🧼 Maintenance
Teak Oil Twice Yearly
🚿 Drainage Style
Elevated Slatted Grate
Alternative Option
Thermotreated Ash offers a similar water resistance profile at roughly 30% lower material cost.
9. Exposed Wood Ribs with Canvas Inserts for Japandi Lightness
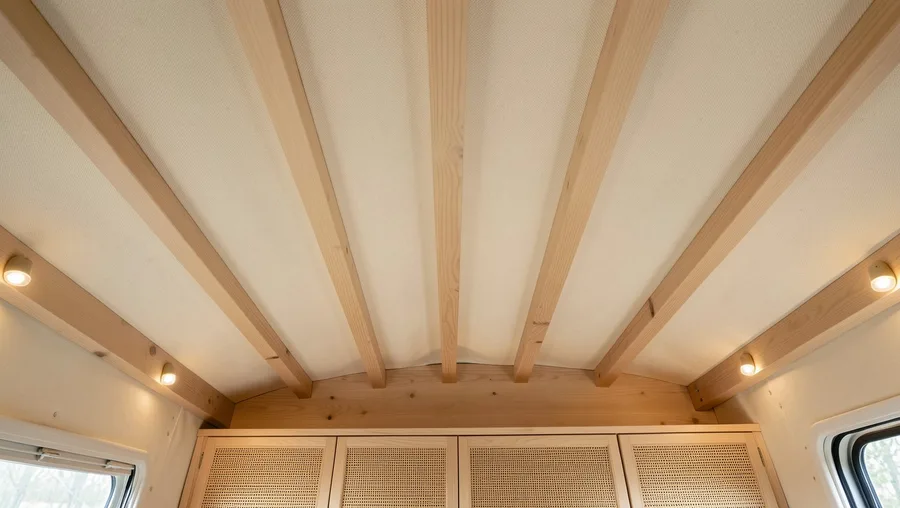
Covering every ceiling inch in solid timber adds unnecessary weight.
This Japandi-inspired approach uses exposed ash wood ceiling joists framing stretched, heavy-weight natural cream canvas panels. Replacing half the wood ceiling mass with durable textile inserts creates an airy, tactile aesthetic that softens interior cabin noise.
You cut total ceiling weight by 50%.
Perfect for lightweight van builds on single-rear-wheel chassis where staying under payload limits is critical.
Treat canvas panels with marine fabric stain repellents to prevent dust build-up and water spotting over time.
🌱 GROWING TIP
Use Marine Canvas for Textile Ceiling Inserts
Always select mildew-resistant 10oz or 12oz marine canvas (such as Sunbrella) rather than standard cotton duck. Marine textiles resist sagging during humid conditions and wipe clean easily.
Van Paneling Installation Roadmap
Allowing sealants to cure outside the van in Stage 3 prevents trapped chemical odors inside your living area.
Where Carpentry Meets Road Safety: The Rules of Van Paneling
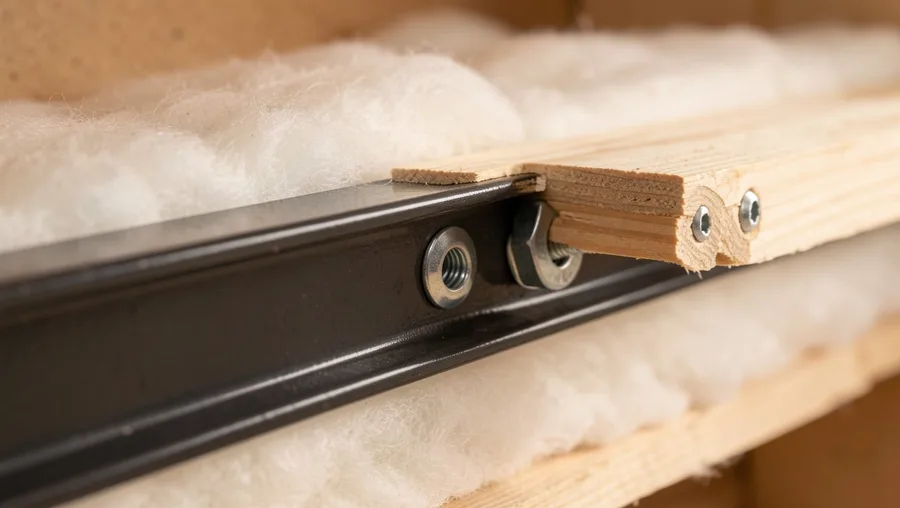
Building inside a vehicle requires balancing interior aesthetics with strict safety standards.
Your total interior carpentry—including wall paneling, ceiling planks, and furring strips—should never consume more than 15% to 20% of your vehicle’s total available payload allowance.
Safety on the road always comes first.
Never drive screws directly through timber into your van’s exterior sheet metal. Drilling exposed holes through outer vehicle walls introduces moisture entry points that cause rust, while risking damage to hidden factory wiring harnesses.
Always anchor furring strips using steel rivnuts threaded directly into the van’s structural internal ribs, then secure your decorative paneling directly to those furring strips.
Campervan Fastening Methods — What to Do vs. What to Avoid
Recommended Safe Practices
- Install steel rivnuts into factory internal rib holes.
- Bolt 1/2" plywood furring strips as an intermediate substrate.
- Leave 1/8" expansion gaps at ceiling and floor seams.
- Pre-seal all 6 sides of wood planks with zero-VOC hardwax oil.
Dangerous Installation Pitfalls
- Driving self-tapping screws through exterior van sheet metal.
- Gluing wood panels directly to bare metal with construction adhesive.
- Tightly butt-joining raw timber without expansion allowances.
- Applying heavy glossy polyurethane inside unventilated cabins.
🪚 Step-by-Step Step Plan for Installing Cedar Ceiling Planks
1. Map Structural Ribs
Locate factory steel ceiling ribs and mark rivnut hole locations across the roofline.
2. Set Rivnuts & Furring
Insert M6 threaded rivnuts into ribs and bolt 1/2-inch birch plywood furring strips across the ceiling.
3. Seal Cedar Planks
Apply two coats of hardwax oil to all four sides of cedar planks and allow 24 hours to cure.
4. Blind-Nail Tongue & Groove
Mount planks starting from the center line out, firing stainless brad nails at 45 degrees through the tongue.
5. Trim Perimeter Gaps
Cover perimeter expansion gaps with lightweight flexible corner molding or scribed ash trim.
Selecting Your Wood Archetype: The Campervan Paneling Matrix
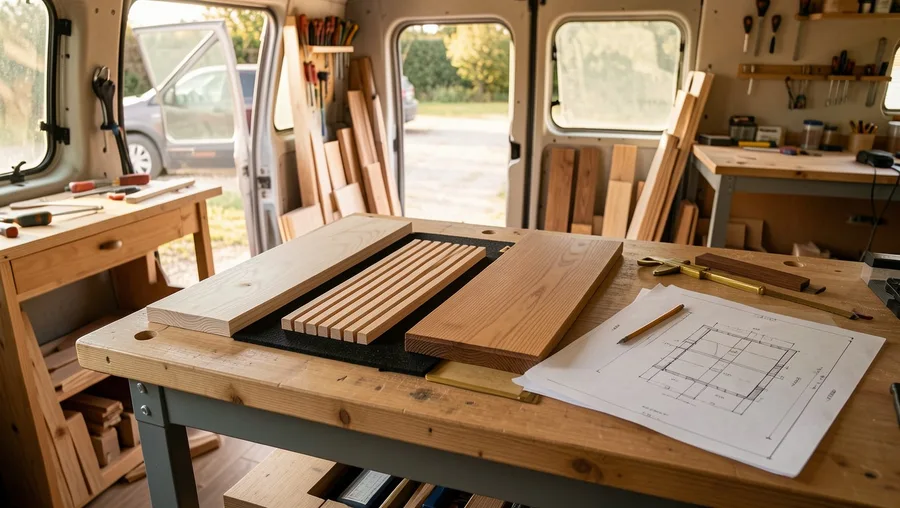
Choosing the ideal wood paneling comes down to honest evaluation of three constraints.
Match your material selection to your personal woodworking skill, vehicle payload capacity, and typical regional climate.
Your constraints choose the ideal wood for you.
Beginners with basic hand tools will achieve the cleanest finish using lightweight 1/4-inch Baltic Birch plywood sheets pre-cut with paper templates. Experienced carpenters can tackle slatted acoustic layouts or geometric chevron door inlays.
Humid coastal environments demand natural rot resistance like Teak or Cedar, while cold alpine climates benefit from thermal-break plywood backing.
Top Paneling Choices Ranked by Ease of DIY Installation
Smart Installation Secrets for a Cabin-Quality Finish
A quiet, rattle-free campervan interior depends entirely on subtle prep details.
Apply thin foam mounting tape or a thin bead of flexible marine silicone along furring strips before tacking down wood planks. This creates a cushion layer that stops squeaks caused by road flex.
Flexible cushion layers eliminate annoying road squeaks.
Remember that wood paneling alone provides almost no thermal insulation value. Always install hydrophobic insulation—like Havlock Wool or 3M Thinsulate—directly behind your furring strips before closing in your walls.
For complex curves at ceiling junctions, scribe cardstock templates first before making final cuts on expensive finish lumber.
💡 PRO TIP
Stop Road Squeaks with Foam Tape
Stick 1/8-inch single-sided foam gasketing tape along the face of all wood furring strips before mounting your wall planks. The foam acts as a shock absorber against frame twisting.
Your First Step to a Warm Interior
Designing a cozy, wood-paneled campervan is about balancing warmth, weight, and light.
Instead of timbering every square inch in solid pine, select one distinct wood archetype—like vertical cedar, slatted oak, or whitewashed birch—and pair it with smart indirect LED lighting and durable fasteners.
Order three wood samples today, test your stains under natural light, and start building an interior you will love coming back to after long days on the open road.