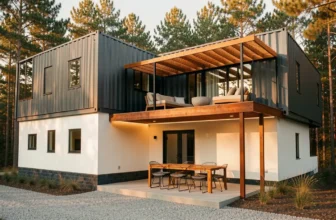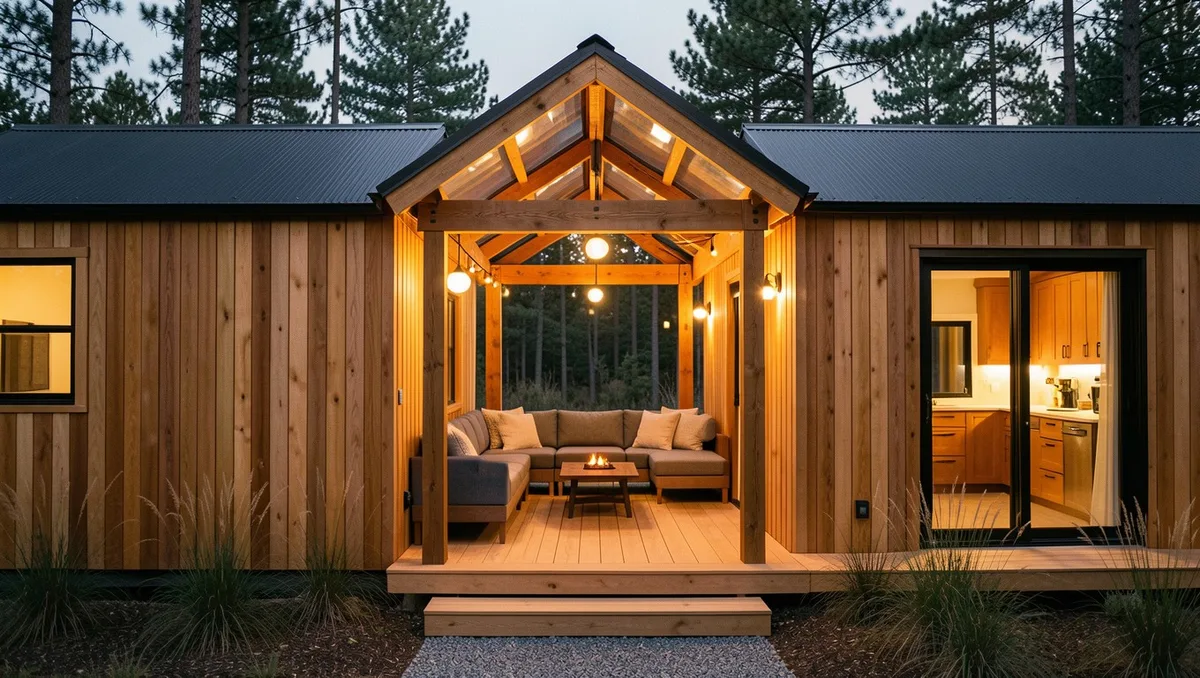
Your tiny house feels perfectly cozy inside, but the indoor floor plan stops dead at forty square feet of usable living space.
Connecting two micro-modules with a covered breezeway creates a massive open-air living room that works in almost any weather. You instantly double your square footage without increasing your climate-control bill or triggering restrictive foundation permits.
A well-built timber connector turns a tight footprint into a sprawling indoor-outdoor homestead.
Save the architectural layouts you would actually build on your property.
Breezeway Planning at a Glance
1. Polycarbonate Vaulted Canopy Between Twin Cedar Cabins
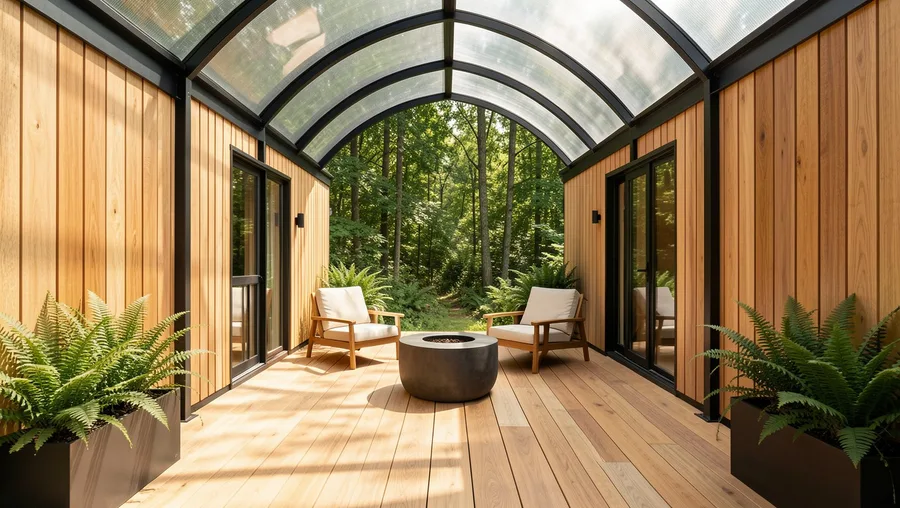
Dark breezeways kill natural light.
Mounting a clear multi-wall polycarbonate arched roof deck between two cedar structures floods both interior living rooms with indirect daylight while keeping rain out completely. The lightweight UV-coated panels slide directly into anodized aluminum tracks secured to the twin fascia boards.
Pair the translucent roof with a raised platform constructed from 5/4-inch thermal-treated ash decking boards.
Position two low-profile teak armchairs and a concrete fire bowl right in the centerline to frame the forest view beyond.
This layout suits high-rainfall regions where preserving indoor light levels is a priority.
💡 Tip: Choose 16mm triple-wall polycarbonate sheets instead of single-layer acrylic to reduce rain noise by up to 12 decibels.
Best For
2. Dual Glass Garage Doors Opening into a Sunken Dining Deck
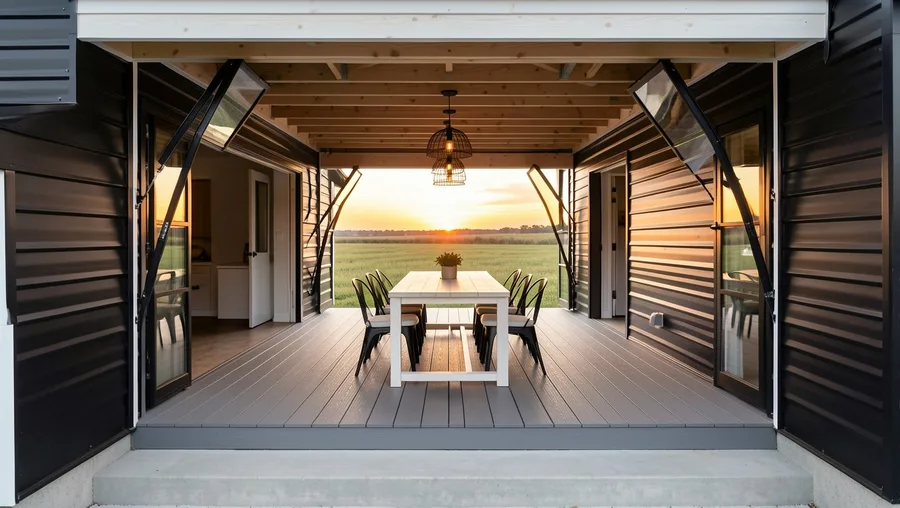
Standard hinged doors destroy floor space.
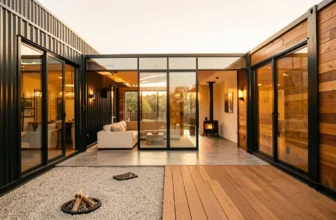
Installing matching nine-foot black anodized aluminum glass garage doors on the facing walls of both tiny home units completely erases the barrier between indoor and outdoor zones. When both doors roll up into the ceiling tracks, the central breezeway becomes an immediate extension of your kitchen island and living room sofa.
Step down two concrete risers into a central dropped-deck dining area anchored by a eight-foot reclaimed white oak dining table.
Sunken footprints shield your seating area from harsh lateral winds.
💡 Tip: Install perimeter brush seals along the garage door track edges to stop drafts cold when closed for winter.
Breezeway Impact Metrics
Real data from dual-module tiny home builds
3. Screened-In Timber Porch with Motorized Retractable Mesh
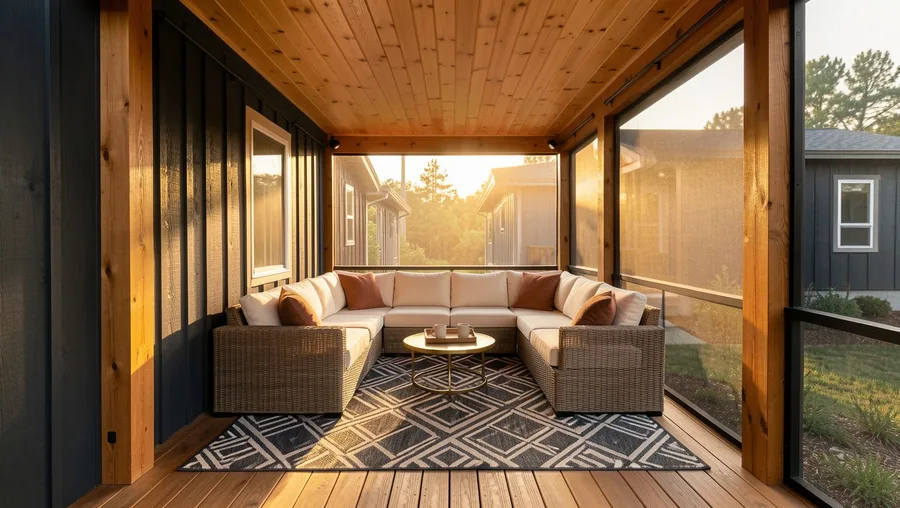
Bugs ruin summer dinners fast.
Recess motorized insect screen cassettes directly into the outer Douglas fir support beams to give you instantaneous control over your outdoor atmosphere. A single button press drops heavy-duty black stainless-steel mesh tracks down to floor level, turning your open breeze channel into a bug-free screened porch in six seconds.
Layer the interior deck with a large flat-weave polypropylene rug in charcoal and bone, topped with a six-piece modular wicker sofa setup.
Ideal for damp lakeside sites or wooded properties overrun with mosquitoes.
Essential Pre-Build Verification
-
Check local setback regulations for multi-module structures Most counties require 10–15 feet from property lines.
-
Verify structural tie-in specs between independent trailer chassis Flexible expansion joints prevent frame torque damage.
-
Calculate roof snow-load capacity for translucent panels Target at least 30 lbs per square foot in northern zones.
-
Select outdoor-rated flooring with slip resistance R11 texture rating or grooved composite boards work best.
4. Cast-Concrete Outdoor Galley Kitchen and Pass-Through Bar
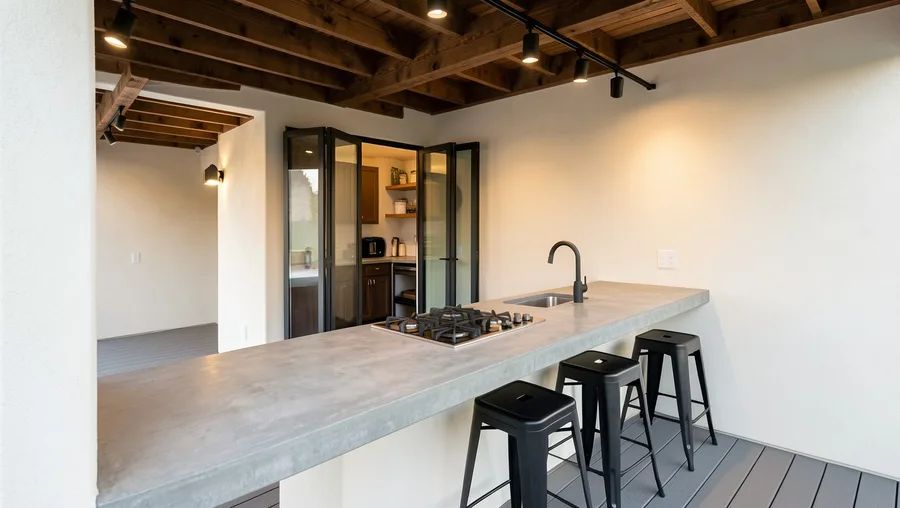
Cooking inside a tiny kitchen heats up your whole house within minutes.
Shift your cooking hub into the central breezeway by pouring a eight-foot cast-concrete counter equipped with a built-in propane cooktop, stainless steel sink, and under-counter marine-grade drawers. Cut a folding accordion window directly behind the counter to pass plates straight from the interior pantry.
Add four matte-black steel barstools on the outer deck perimeter to host six guests without cluttering the main house floor.
Concrete counters withstand rain and heavy cast-iron pans effortlessly.
💡 Tip: Seal raw concrete counters with food-safe penetrating epoxy sealer every two years to prevent oil staining.
Breezeway Material Selection Guide
- Thermal Ash & Composite Decking — Zero rot, high dimensional stability, stays cool underfoot.
- Polycarbonate Roof Panels — Translucent daylight, impact resistant, simple aluminum frame installation.
- Unsealed Pine & Pressure-Treated Softwood — Requires annual staining, splinters easily over time, prone to warping.
- Untreated Interior Drywall on Facing Walls — Fails rapidly due to wind-driven rain and ambient moisture cycles.
5. Two-Story Slanted Roof with Overhead Sleeping Loft Bridge
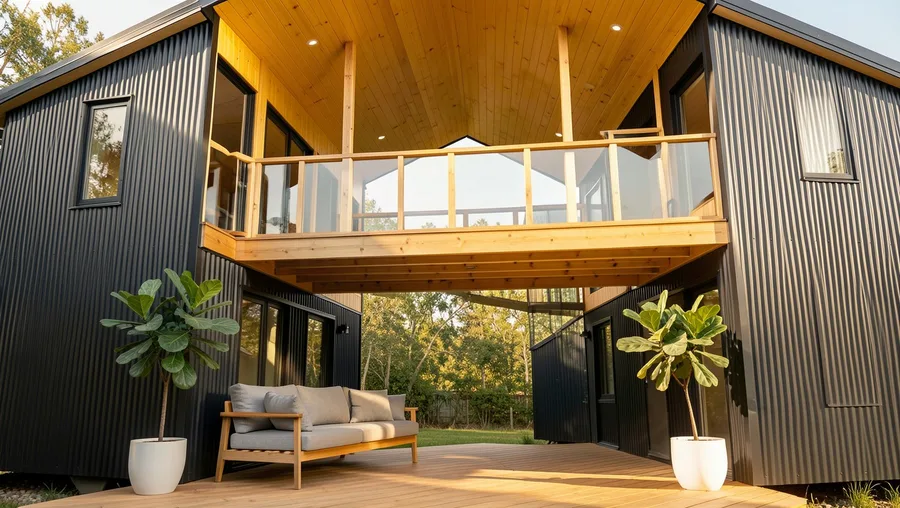
Ground space is only half the battle when designing compact home footprints.
Build a high single-pitch shed roof over your breezeway, spanning twelve feet above the floor deck to accommodate a enclosed second-story timber catwalk bridge between two upper sleeping lofts. The high roof angle scoops cool valley breezes down into the ground deck while giving you dry walk-across access upstairs.
Construct the catwalk floor using narrow cedar battens spaced half an inch apart to let ambient sunlight pass through to the patio seating below.
This vertical approach doubles living area and bedroom connectivity in one footprint.
6. Curved Slatted Cedar Privacy Wall with Hanging Herb Garden
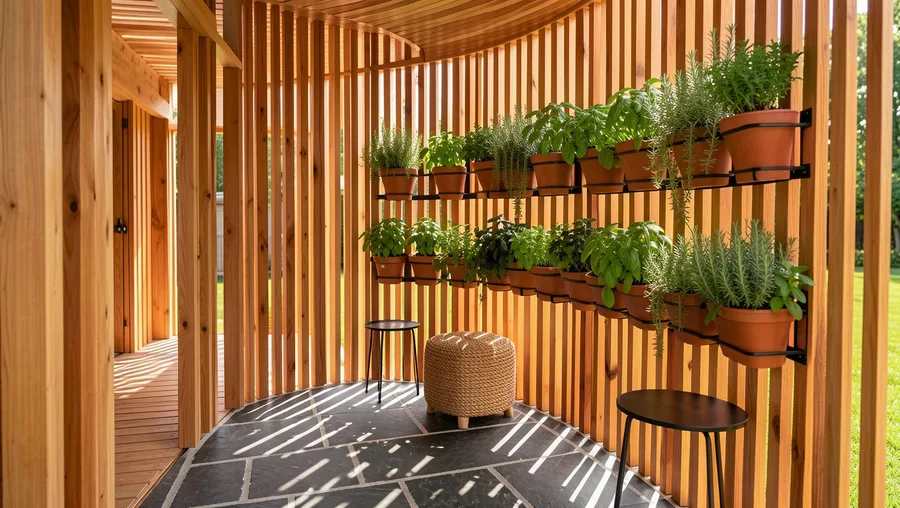
Close neighbors ruin the outdoor cabin experience.
Erect a freestanding six-foot curved wall using 2×2 slatted cedar posts along the windward side of your breezeway connector to block line-of-sight views from surrounding roads. Mount black powder-coated steel rails along the slats to hold thirty small clay pots filled with fresh basil, thyme, and rosemary.
The slatted construction breaks up heavy gusting winds into gentle air movement without darkening your outdoor lounge.
Combine the wood wall with dark slate floor tiles laid over a stable gravel foundation.
💡 Tip: Stagger the slat spacing from 1/2 inch at eye level to 1.5 inches higher up to maximize privacy without losing wind flow.
7. Double-Sided Freestanding Masonry Fireplace and Hearth
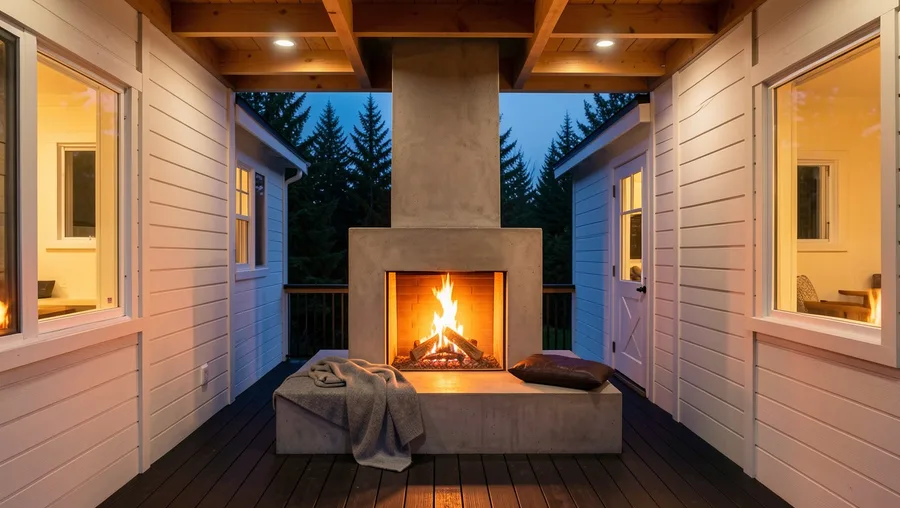
Cold evenings force everyone back into separate cramped tiny rooms.
Anchor the outer open end of your breezeway deck with a tall custom board-formed concrete or stacked stone fireplace featuring dual open hearths. One side warms the central breezeway lounge area while the opposite side faces an open lawn fire pit zone.
Lay a wide concrete hearth bench directly across the chimney base, layered with thick wool throw blankets and leather floor cushions.
A heavy masonry core retains solar heat during the afternoon and radiates it back into the deck seating all night.
🔨 5-Step Breezeway Construction Sequence
Align & Anchor Chassis
Park and level both tiny home chassis parallel to each other at your target spacing width.
Set Perimeter Posts
Dig and pour concrete footings to hold heavy 6×6 timber posts along the deck boundary.
Frame Ledger & Decking
Attach expansion-joint ledgers to both structures and lay rot-resistant thermal wood decking.
Raise Roof Rafters
Mount clear-span roof trusses overhead and secure your chosen translucent or metal roofing.
Install Doors & Fixtures
Hang sliding or roll-up glass doors and run waterproof electrical conduits for light fixtures.
8. Sunken Cedar Hot Tub Platform with Cedar Privacy Louvers
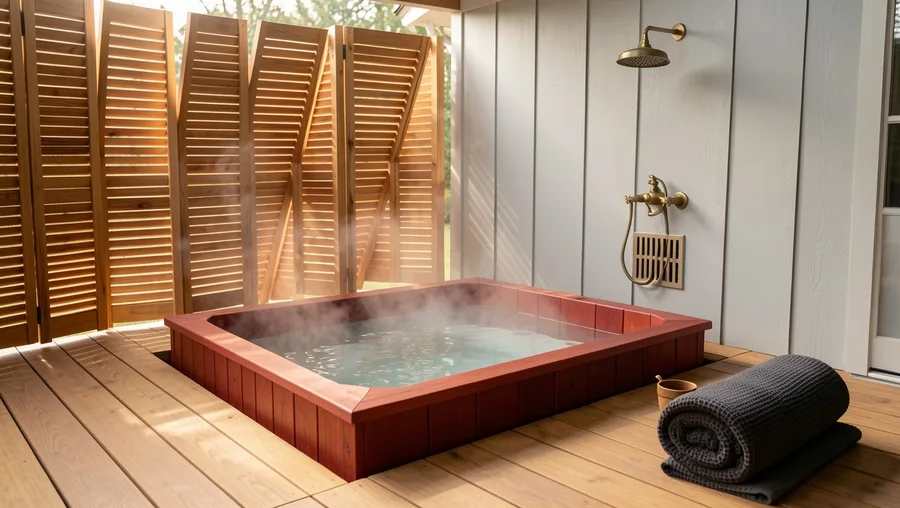
Indoor bathrooms lack space for luxury soaking tubs.
Drop a four-person square red cedar tub directly into the center of your breezeway floor frame so the top lip sits completely flush with the surrounding wooden deck. Surround two sides with adjustable vertical wood louvers that tilt closed when you want full privacy.
Add a wall-mounted brass outdoor shower fixture with an exposed rain shower head directly on the adjacent cabin wall.
Dropping the tub into the deck structure keeps your sightlines clear right through the entire structure.
💡 Tip: Build an insulated trap door panel over the recessed tub so you can step directly across it when not soaking.
9. Suspended Canvas Hammock Bed and Modular Floor Cushions
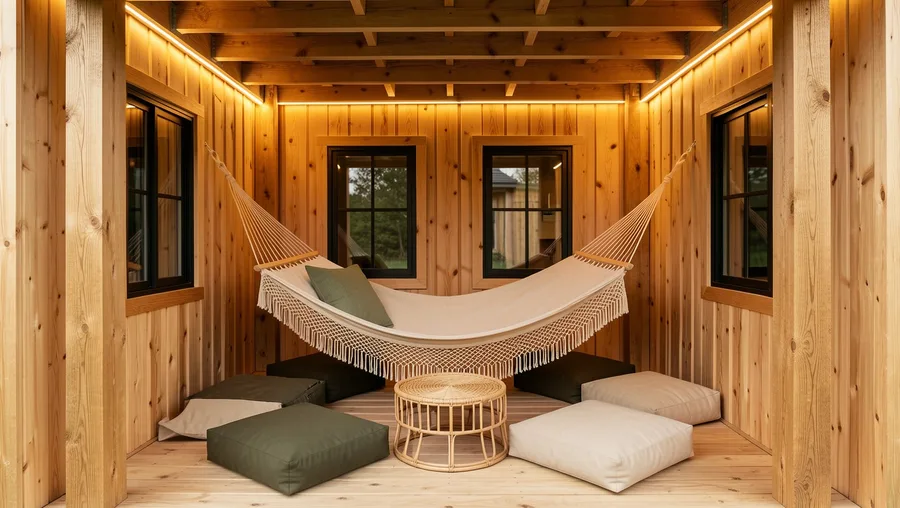
Traditional outdoor furniture clutters narrow outdoor halls.
Anchor four heavy stainless-steel eye bolts directly into the structural corner posts of the breezeway ceiling frame to hang a custom ten-foot natural cotton canvas lounge hammock. Spread large rectangular floor cushions wrapped in weather-proof Sunbrella fabric across the deck surface below for flexible lounging.
Unclip the hammock carabiners in three seconds when you need an open passage to move large gear between units.
This layout converts an ordinary outdoor walkway into a relaxing reading nook.
Breezeway Roof Style Comparison
Light transmission vs shade performance score
10. Industrial Black Steel Glass Atrium with Bi-Folding End Walls
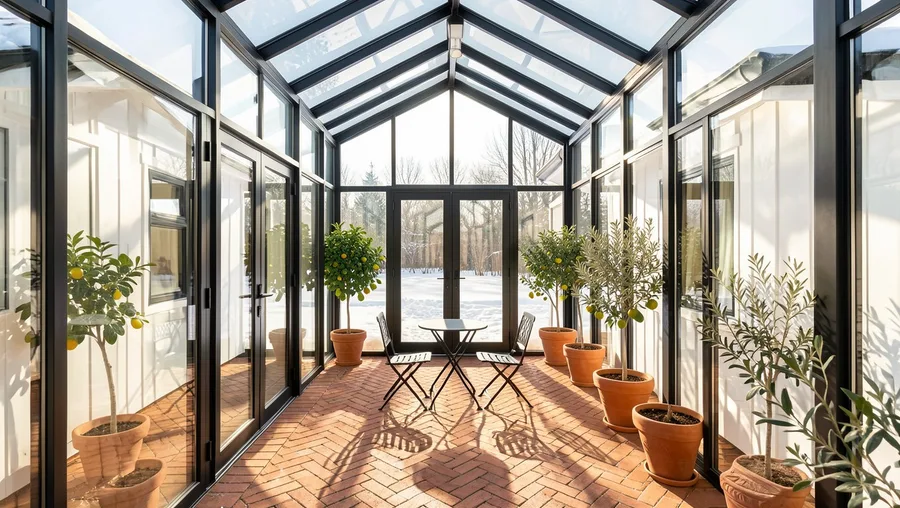
Winter winds render open outdoor decks completely useless in colder climates.
Enclose the entire breezeway corridor in a black powder-coated steel frame featuring double-pane thermal glass panels and four-panel bi-fold glass end doors. Opening both ends in July delivers a breezy open hall, while locking them tight in December creates a passive solar sunroom that pre-heats air for both cabins.
Pave the interior floor with terra-cotta brick pavers laid in a herringbone pattern to store daytime heat energy.
This year-round atrium setup operates as a dining room, greenhouse, and main entryway.
Open Air vs. Glass-Enclosed Layouts
Open Covered Breezeway
- Lowest material and build cost
- Zero window cleaning maintenance
- Maximum cross-ventilation in summer
- Unrestricted open-air outdoor feel
Glass Atrium Breezeway
- Full 365-day usability in cold climates
- Acts as a passive solar heat trap
- Protects outdoor furniture from weather
- Requires higher budget and thermal glass
11. Sliding Barn-Door Pantry Storage Wall with Integrated Bench
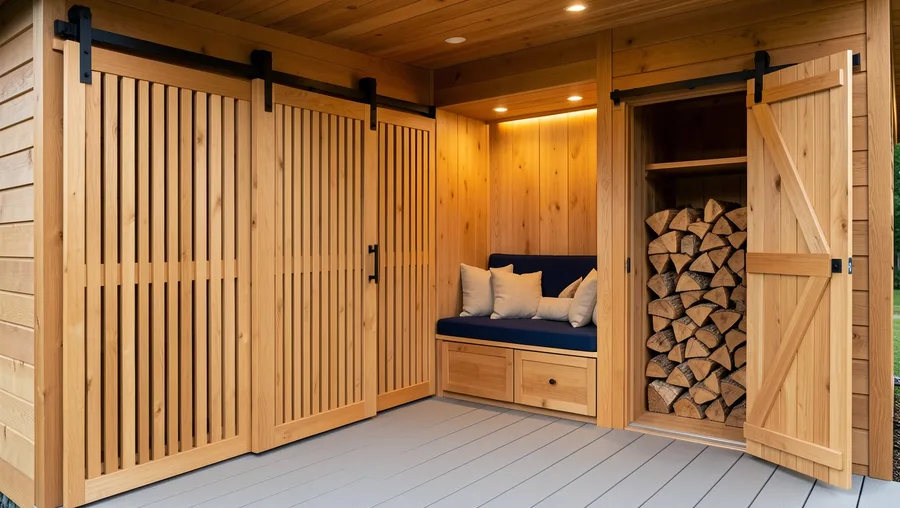
Tiny home living demands that every single wall surface store essential gear.
Line one complete facing wall of your outdoor breezeway with five-foot-deep floor-to-ceiling wooden storage cabinets fronted by track-mounted sliding cedar barn doors. Build a six-foot bench seat directly into the center section of the cabinet run, topped with a custom outdoor cushion in navy canvas.
Store outdoor folding chairs, firewood, propane tanks, and bulky camping gear out of sight behind the weather-sealed doors.
This arrangement keeps clutter off your living room deck.
💡 Tip: Line the interior of outdoor storage cabinets with marine grade plywood to stop moisture warping.
Breezeway Space Usage
How tiny home owners split their outdoor square footage
12. Cantilevered Floating Deck Platform over Steep Slope
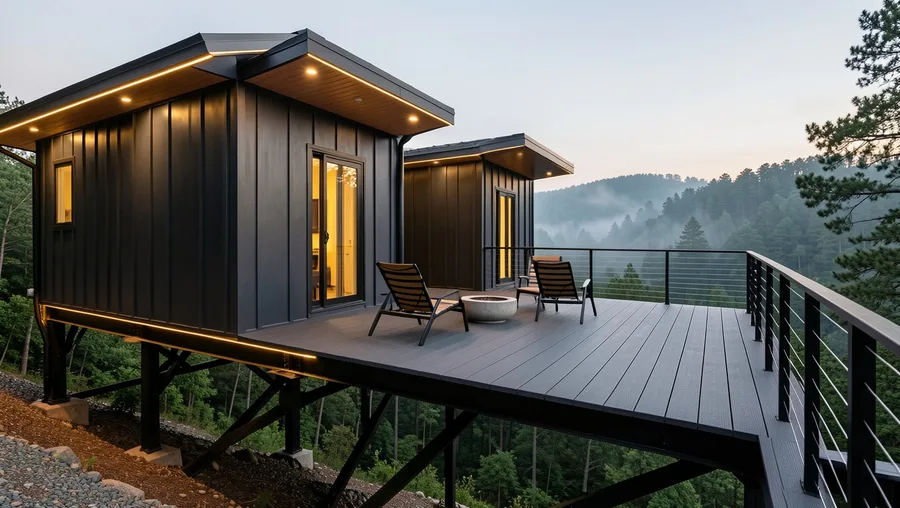
Mountain or hillside building sites limit ground deck construction.
Extend heavy steel I-beams out from under both trailer chassis to cantilever your central breezeway deck right out over a sloping hill or ravine edge. Secure cable-wire railings along the open precipice edge to maintain unobstructed forest views straight from your sofa.
Lay wide-plank dark grey composite decking across the floating frame to form a dramatic bridge platform between both living cabins.
Floating structures create a striking architectural profile on sloped terrain.
Avoid These Common Breezeway Layout Errors
Start With Your Covered Floor Layout
Building a breezeway is the fastest way to turn two small trailer footprints into a expansive home layout.
Pick one anchor feature first—whether that is an outdoor galley kitchen or a glass garage door transition—and build the deck frame to support it.
Your outdoor deck space will quickly become the true heart of your tiny home homestead.